Today’s show is sponsored by Brusso Hardware where you get great quality hardware. Woodtalk listeners can use coupon code ‘WOODTALK’ for 10% off your first order at brusso.com
On today’s show we’re talking about cutting a juice groove in a cutting board, planers and Pine, bench top mortisers, power carving tools for bowls, and our strategies for dealing with squeeze out.
What’s On the Bench
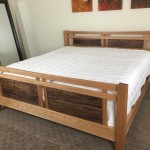
- Marc finished his bed then built a sword with his son.
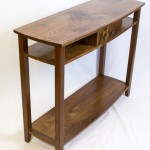
- Matt is slacking and editing video of his Sofa Table.
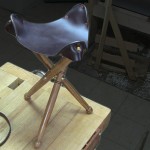
- Shannon wrapped up another Campaign Stool.
What’s New
- Billy shared a cool video of a lumber yard in action shot from a drone.
- Veritas has updated their small Plow Plane.
- Brandon found some great videos showcasing some amazing craftsmanship
- Marc shared a funny video called The Maker. The Maker from Patrick Kehoe on Vimeo.
- Jason said that the new side clamping accessory for the Veritas MKII honing guide has solved all his wonky bevel issues.
- Chris shared a service to help you find hardware parts by taking a picture
Kickback
- Nate shared some kickback about the snipe issues with a thickness planer from a few shows ago.
- Jason has a tip for working with knockdown hardware.
- Josh wants to know which side of the strop to use the abrasive on.
- Kevin has a tip for picking good quality construction lumber
- Ray said that WoodTalk is a great parental motivation tool.
Featured Topics
- Do you put glue on both boards when gluing up a panel? What is your glue handling “process”.
Voicemail
- Paul wants to know if screws from an old Stanley plane will fit a new one. This post should help.
- John wants to know everything about Power Carving…Shannon took a nap during this one!
- Otto is wondering what the best way is to make a juice groove on a cutting board.
- George says, “are benchtop mortisers worth it?”
- Oscar is having problems with Pine in his thickness planer and the rollers not pulling it through.
How You Can Support Us
Use the links in the left column and sign up for a recurring donation, kick it up a notch and wear a Wood Talk T-Shirt, or leave us an iTunes Review


12 replies on “WT297 – Cremona Cold”
So was Matteo’s sword made of Bubinga?
haha just some lowly cherry!
I’ve played a little bit with power carving bowls, and I made some practice blanks out of box store 2×4’s I had lying around. I trimmed off the rounded edges, ran a hand plane over the faces a couple of passes to get a smoother surface, cut some short segments, and glued them up into blanks. They don’t make great bowls, but it’s cheap way to play with techniques.
I have done some power carving and to add to your response to John I have a few thoughts.
Gluing up thinner boards works well both for practice and by using contrasting/complimentary woods you can create very interesting platters and bowls.
The turbo plane is a great blade to start with, but if you want to go deeper or smaller, John may want to get the mini-turbo as well. It comes with sanding disks that can help smooth out the final product.
Lastly, I have found the Black and Decker Workmate is great for holding your work. I found it best to hollow the piece while square, then working the outside later. The Workmate gives you a lot of different ways to hold the piece, and as you go from square to rounded, that comes in very handy. Plus, you can move all around the Workmate as you carve. I think other companies make similar products if you don’t want B&D.
Great show
I actually have an “unheated” garage that get cold (5c/40f). I used my planer 2 week ago and the wood was not grabbing well. I have been keeping my shop warm since then. I didn’t got any grabbing issue, that might explain it.
This is a lot of wooden gears and moving parts! http://youtu.be/IvUU8joBb1Q
When I was an apprentice I learned that the slot in the threaded inserts wasn’t for a screwdriver but for helping cutting the wood while screwing it in. So the slot should go in first.
With regard to finishing the “A” and “B” sides of a panel, unless the panel is a some kind of stand alone piece (though I can’t think of something like that offhand) there’s always some point of attachment where you can drive a small screw and the hole will be concealed during assembly. For example, with a table top: After drilling for the screws that hold the buttons used to attach the table top to the apron, I leave a few screws in the holes without their buttons. These provide built in support during finishing. Do the underside, then flip over and do the top. The bottom stays untouched when you flip it over and no painters’ pyramids needed.
Here’s some more kickback on the Dewalt 735X and snipe. On the past podcast, Marc said nothing was adjustable on these lunchbox planers. However, the extension wings can be adjusted for height. I haven’t had to adjust mine, and I have little to no snipe, even without lifting up on the board ends (unless they are very long boards). Perhaps the tables on the caller’s planer need to be raised a bit. See the photo from the Amazon listing where you can clearly see the hex screws for adjustment.
http://www.amazon.com/DEWALT-DW735X-Two-Speed-Planer-Package/dp/B003OX9KME/ref=sr_1_1?ie=UTF8&qid=1457104882&sr=8-1&keywords=dewalt+735x
Stanley actually has it’s very own thread pattern. there are a few websites out there offering parts for your plane.
Ebay is also another good resource for misc plane parts.
Hope this helps.
How about another title recommendation? “Funky Cold Cremona”. Maybe I am just too old and reminiscing that jam from Tone Loc!
There’s a tool for that. In listening to your one of you latest shows. One of your Listeners was having trouble installing Treaded inserts. He was trying to use a flat head screwdriver. I am guilty of trying to do the same at one time. In one of my trips to the International Woodworking Fair in Atlanta GA. I spoke to one of the fastener manufacturers. The rep explained to me that the 2 slots are for the insert driver, that fits a drill or driver. He also said that there is a hand tool ( for the hand tool folks) that looks like a “T” wrench with a treaded end. The slot are for speed of installation in factory environment. So for best results he recombined proper hole size ( soft or hard wood) and to use proper Tool.
FYI loving the show. Really like how the new Matt is fitting in. ( Hi Matt). Keep up the good work.
Amazon info for Drivers: http://www.amazon.com/E-Z-LOK-Drive-Tool-Optional/dp/B00209X86W/ref=pd_rhf_gw_p_img_1?ie=UTF8&refRID=0CBYCNPVWCE8BBDPHP3G